
When promoting your music, it’s important that you NOT put all your focus on a single streaming service. Your fans aren’t all in the same place; listening is fragmented across numerous platforms, including Spotify, Amazon Music, YouTube Music, and Apple Music.
Any promo message you share with your entire audience should acknowledge that fact, and Apple Music should be featured alongside other popular services. That’s because as of 2020, Apple Music is second to Spotify in overall subscribers. The numbers break down like this:
- Spotify: 144+ million paid subscribers
- Apple Music: 72+ million paid subscribers
Apple Music was also one of the top revenue sources for CD Baby artists in 2020.
How can you make sure you’re making the most of your presence on Apple Music? We’ll get to that. But first, a little history.
How did Apple Music start?
As its name suggests, Apple Music is the music streaming branch of Apple, the tech company responsible for the Macintosh computer, iPhone, iPad and other various gadgets with hundreds of millions of users the world over. You might also remember an old program called iTunes. Apple Music is a spiritual successor to that too, but we’ll get to that in a bit.
The genesis of Apple Music began with Apple’s purchase of Jimmy Iovine and Dr. Dre’s company Beats Electronics — and with it Beats Music — in May 2014. Beats Music had launched as a streaming service earlier that year and had amassed a library of more than 20 million songs.
One year after its purchase of Beats, Apple merged Beats Music’s library with its own Internet radio service iTunes Radio. Apple announced its new music streaming service in early June 2015, and officially launched Apple Music at the end of that month.
Within its first six months, Apple Music had surpassed 10 million users. By mid-2019, it had reached its latest major marker of 60 million users, beating Spotify in paid subscribers.
Why should I distribute to Apple Music?
That last milestone is significant because unlike Spotify, Apple Music only offers paid subscriptions. Any paid subscription service will pay more for streams compared to a platform that offers a free streaming option.
In fact, Apple Music released a memo to artists, labels, and other rights holders in April of 2021 detailing its per-pay rate as one cent per stream.
That’s quite a bit higher than other platforms. It’s worth remembering, though, that payout rate is an average, not a flat rate. Actual payouts vary based on Apple Music’s total streaming earnings each pay period. However, it’s still an impressive move from a large digital platform to provide more visibility into the payment process.
The other major reason to get your music on Apple Music is simply a numbers game: since it’s pre-installed on all Apple devices, Apple Music has a built-in potential user base. Considering Apple CEO Tim Cook’s report in early 2020 that there are 1.5 billion active iOS devices, that’s a lot of potential Apple Music users! Especially since Apple offers a free three-month trial to entice new users into subscribing. Don’t ignore that huge market of users. Get your music on Apple Music.
How do I send my music to Apple Music?
Okay! Now that we’ve convinced you why you should be on Apple Music, how do you go about doing it?
Just like getting your music on any other music streaming platform, you’ll need to use a music distributor to send your music to Apple Music. CD Baby does the job here. Along with dozens of other streaming platforms, we deliver your music to Apple Music, all for the same one-time fee. And it’s easy to do. Just follow these steps:
- Click Add New Title on your Dashboard
- When you reach the Distribution Options page, select Downloads and Streaming
- Make sure Apple Music is checked on the list of partners
And that’s it! CD Baby will distribute your music to Apple Music along with the other platforms you selected.
How do I claim my Apple Music artist profile?
Once your music is available on Apple Music, you can claim your artist profile on Apple Music through their feature called Apple Music for Artists. This is similar to verifying your artist page on Spotify. Both features allow you to customize your artist profile and view stats and data, including:
- Plays from on-demand streaming
- Average daily listeners
- Song purchases on iTunes
- Radio plays on Apple Music
- Shazams (yes, Shazams!)
- Insights and milestones for your music worldwide (for instance, “You passed 10,000 all-time plays in Canada”)
- Plays from playlists
- Most played songs
- Popular countries (with heat maps)
- Demographic and geographic information about your listeners (by song, album, playlist, etc.)
- And more
The really cool thing is that you don’t even need to go through the rigamarole of claiming your profile with Apple Music if you’re distributing with CD Baby. You can claim your Apple Music for Artists page right in your CD Baby account!
To claim your Apple Music for Artists profile:
- Click Tools and Promotion on the Dashboard
- Click Apple Music for Artists Request Access Now
- Or just head here to be taken to the page
Can I make my music available to pre-save on Apple Music?
In another parallel to Spotify, Apple Music offers a feature similar to pre-saves. “Pre-adds” on Apple Music allow listeners to save an album that is available for pre-sale on iTunes to their Apple Music Library. On the sales start date, the album will automatically be available in the listener’s Apple Music Library.
Pre-adds can also include an “instant gratification” track if the artist chooses to make one available. This means when a listener saves an album, they can hear one song from that release right away. They are then notified when the full album launches.
How is Apple Music pre-add different from Spotify pre-save?
The only major difference between Spotify pre-saves and Apple Music pre-adds is that only albums are eligible for Apple Music pre-adds. Single-song releases cannot be opted in for Apple Music pre-add.
How do I submit my music for Apple Music pre-add?
You can opt in your album for Apple Music pre-add during the submission process with CD Baby. Follow these steps:
- Select a release date far enough ahead of time to qualify for pre-add (use CD Baby’s Release Generator to plan it!)
- Opt in for distribution to both iTunes and Apple Music
- Select iTunes pre-sale
- Choose your pre-sale date
- Choose your instant gratification track
How do I create a playlist on Apple Music?
Since Apple Music is a bit more exclusive in its membership thanks to its subscription-only approach, functions like playlist creation aren’t as transparent as they are on other platforms. But making a playlist on Apple Music is actually pretty easy once you know the steps:
- Open the Apple Music app.
- At the bottom of your screen, tap Library.
- Tap Playlists.
- Tap New Playlist.
- Give your playlist a name, then tap Add Music.
- Search for music that you want to add, tap it, then tap Done.
You can also make your playlist public by selecting “Show on My Profile and in Search.”
How do I share my Apple Music playlist?
You can share your Apple Music playlist on social media by following these steps:
- Make sure that Facebook, Instagram, or Snapchat is installed on your device.
- Open the Apple Music app.
- Find a song, album, or playlist that you want to share.
- When you find something, touch and hold it, then tap Share.
- In the apps section of the share sheet, tap Facebook, Instagram, or Snapchat. If you don’t see Facebook, Instagram, or Snapchat on your iPhone, iPad, or iPod touch, swipe left on your apps, then tap More button.
What is Apple Music Radio?
Earlier in this article we mentioned that iTunes Radio was merged into Beats Music to create Apple Music. So far we’ve only talked about the on-demand music streaming portion of Apple Music, but the radio side still exists and is a versatile way to discover new music.
Apple Music Radio is divided into two separate sections:
- Apple Music 1, which is a 24/7 radio station much like any traditional FM station. This radio station is further split into three stations:
- Apple Music 1: the flagship station of Apple Music 1 radio. This airs a mix of the latest songs from popular music genres like pop and rap.
- Apple Music Hits: this station airs hits from the previous three decades. Sure to cross appeal for Gen-Xers and Millennials alike.
- Apple Music Country: Apple Music Radio’s country station airs modern and classic country hits.
- Apple Music Radio: unlike Apple Music 1, Apple Music Radio stations are not curated by DJs and can represent a broad swatch of genres. These stations are classified into two categories:
- Semi-automated stations that are pre-created and organized by genre. So if you tuned into an ’80s metal station you’d expect to hear all the bangers from Maiden, Priest, Ozzy, etc.
- Custom stations are created by users. Now, these stations aren’t completely customizable track-by-track. Instead, Apple Music’s algorithm creates a station for you based on your taste and the song you’re currently listening to.
To create a custom station on Apple Music:
- Start listening to a song you enjoy.
- Click the ellipses (the three dots) button to the right of the song.
- Select Create Station from the menu.
How do I promote my music on Apple Music?
Did you know there’s a suite of promotional tools available through Apple Music? You can use these tools to:
- Create a track preview tweet: You can post a Twitter Audio Card that showcases a 30-second preview of your song complete with cover art. This preview contains a link so fans can easily head to Apple Music to hear the full song.
- Create an embeddable player: Like the Twitter Audio Card, this player allows listeners to hear a 30-second preview of a song, with the added flexibility of being embeddable on any site that accepts the web code. It also shows the entire tracklist of your album. And if the listener is an Apple Music user logged into their account, they can play the full songs right in the player without leaving your site!
- Create badges and icons: A badge is a branded image related to a product, with text displaying the name of that product. An icon is just the product’s imagery. Apple Music has instantly recognizable imagery with its music note and pink color scheme. You can use that to promote your music embedding one of these easily identifiable links to your song or album on Apple Music on your website.
- Create links to your music: This one is pretty straightforward. You can send fans right to your song, album or even playlist with a link that will open Apple Music on their device. You can even create a shortened link for social media posts!
Play songs from Apple Music to your app with MusicKit
This is decidedly less straightforward. If you’re an app developer, you can allow your app’s users to play songs from Apple Music in your app with a feature called MusicKit. When users accept permission to log in to their Apple Music account, your app can play any song from Apple Music’s entire library.
This is a developer kit, so it requires coding knowledge for the iOS or Android platforms. It’s not for everyone, but for the coders out there who are also musicians, your fans can access your music in your app!
How do I add my lyrics on Apple Music?
You can add lyrics to all your songs on Apple Music, and it’s pretty simple to do. However, you should know that lyrics need to be added one song at a time. There’s no bulk upload function. Also, the syncing feature that matches the words with the vocals is only available at the discretion of Apple Music’s editorial team.
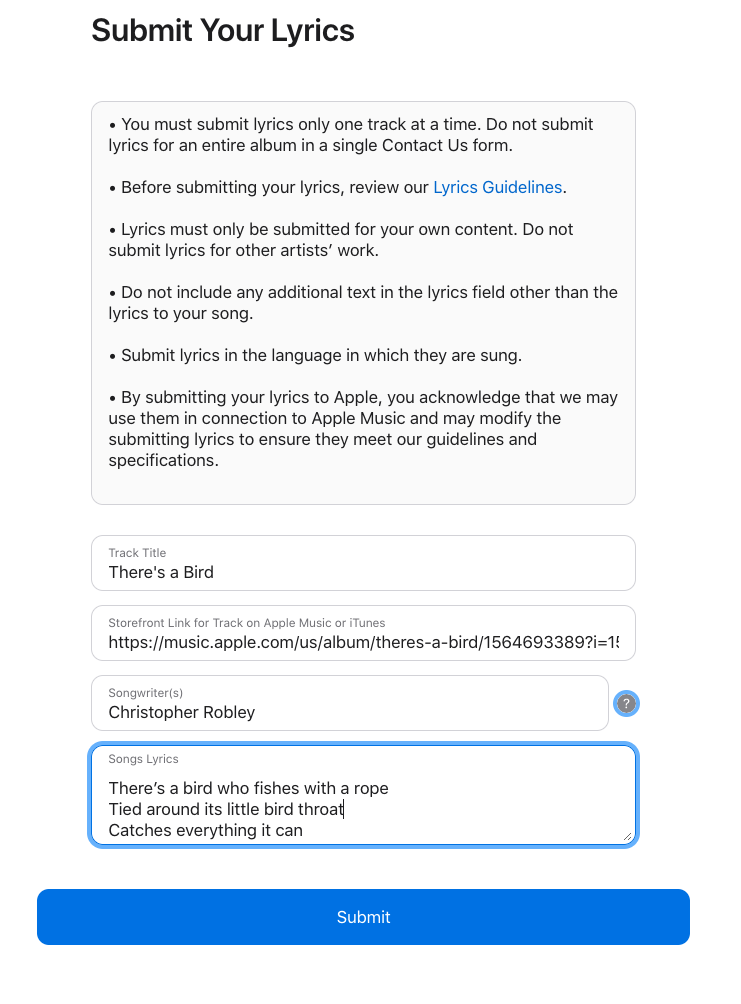
Here’s how to submit your song lyrics to Apple Music:
- Go to this contact form
- Fill out the contact and artist info (you will need an Apple ID)
- From the “Topic” menu, select Submit Your Lyrics
- Provide the link to the song on Apple Music (to find the URL to your song on desktop, go to the iTunes Store and search for your track. Click the arrow next to the price and choose Copy Link.)
- Enter the lyric writers’ names, separated by a comma
- Copy and paste your words into the Lyrics field
IMPORTANT: Make sure to format your lyrics according the requirements in Apple Music’s lyrics guidelines! For accuracy, do that BEFORE you copy and paste the text into the lyrics field.
Once you’ve submitted the lyrics, you’ll get a confirmation email to your Apple ID address. That email says it can take up to 10 days for the lyrics to be reviewed.
Use Ad Builder and HearNow
You can also use Show.co’s Ad Builder to embed your songs into interactive ads on your fans’ favorite websites.
And don’t forget about HearNow smart-links, which house links to your music on platforms across the Internet, including Apple Music.
Did iTunes disappear?
You may remember back in 2019 that Apple announced it was discontinuing iTunes. While this is true, they didn’t completely put it out to pasture. Instead, Apple merged iTunes with Apple Music.
So yes, your fans can still buy and download your music on iTunes. They just click the iTunes Store tab in the Apple Music app. And CD Baby still distributes to iTunes, so make sure they’re selected for those fans who want to purchase music instead of streaming!