
Split your images into grids on Instagram to get more mileage out of your cover art, concert posters, festival announcements, and video launches.
Later this month I’m releasing a new single, and I’m trying to get as many people as possible to “pre-save” the song on Spotify so it’s in their queue and ready to be heard right on the drop date.
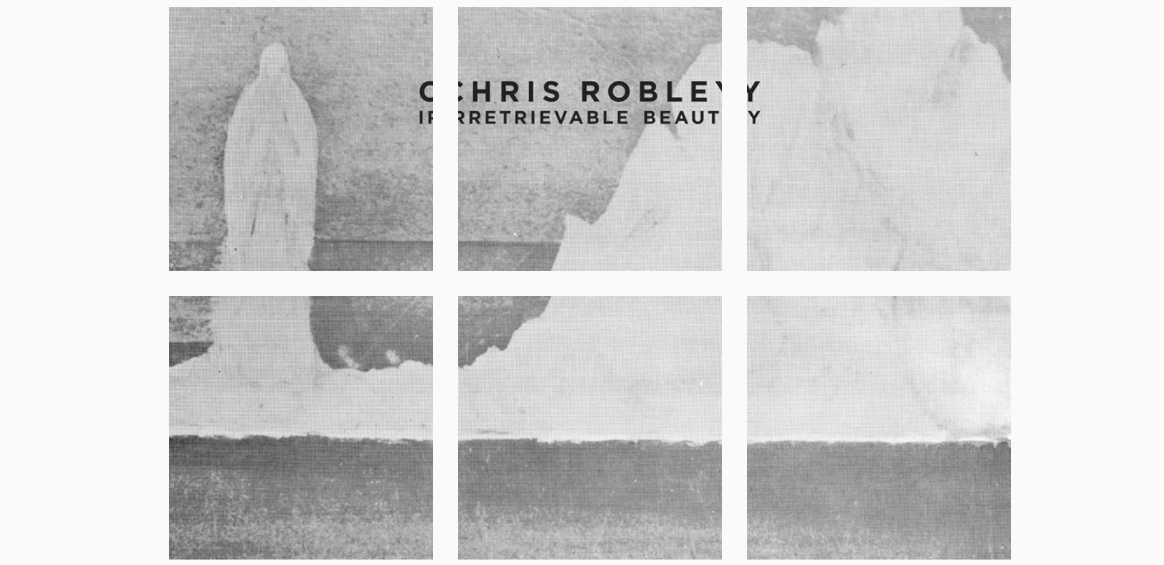
One obvious way to promote a single or album ahead of its release is to share the cover art. But rather than simply posting the image once on each social platform with a link to the Spotify pre-save campaign, I decided to chop the cover artwork into smaller photo tiles that could be posted one at a time on Instagram and, because of the predictable way Instagram displays photos on your main profile page, they’ll eventually come together over the course of a week like puzzle pieces that display the whole image.
This gives me multiple chances to share information about the pre-save while teasing the artwork and, hopefully, making my audience curious enough to follow along as the whole cover is slowly constructed.
You could split an image into tiles to share:
- the cover of an album or single
- the poster for a big album release party
- tour dates
- an interesting still image from an upcoming music video
- or pretty much anything else that’s newsworthy
I saw the band Wilco use this photo strategy on Instagram to announce the dates of one of their Solid Sound Festivals a few years back.
To split your images, use one of these tools:
- Pic Splitter — This super simple app for iOS devices gives you an easy way to select a grid pattern and create tiles from a larger image.
- 9square for Instagram — This app for Android devices lets you crop photos into grids and post them directly to Instagram.
- ImageSplitter — This is a free website where you can upload a photo, choose the appropriate grid, and download a zip file with the component tiles. Note: The image files it creates will not always be numbered in a way that corresponds to the order you should post the pictures to Instagram, so see step #10 below.
Ten tips for splitting promo images:
1. This works best on Instagram
As I said above, Instagram has a standard, predictable way of displaying photos on your main profile page. So Instagram seems like the obvious place to try this technique of splitting a photo and then reconstructing it piece by piece. You could mimic the technique on Facebook or Twitter, but it’s not as natural a fit, and plus, I think it’s cool when the artists I like do something that’s exclusive to a particular platform.
2. The chopped up images must be shared sequentially, so be patient!
This only works if you post all the pieces of the image in sequence. If you’re teasing the thing over the course of a week, but in the middle of that week you want to post a really awesome photo of a rabid flying squirrel eating a burrito, well, you’ve just interrupted the whole flow of the tiles, and now they won’t correctly fit together to form the final image.
3. If your final image is square, split it into nine smaller squares.
Again, that’s just the most natural fit for how Instagram displays photos on your profile page. So choose a 3×3 grid pattern (for a total of 9 images).
4. Start with as hi-res an image as you can…
… because you’re about to share much smaller components of that original image. Some pixelation or blurriness might be inevitable, but try to minimize it by starting off as high-res as possible.
5. Tiles should be posted from the bottom right to the top left.
If you want to build the final image correctly, you’ve got to post the tiles in the right order. Assuming you’ve split the image into a 3×3 grid, you’d upload the tiles to Instagram in this order:
- Bottom right
- Bottom middle
- Bottom left
- Center right
- Center middle
- Center left
- Top right
- Top middle
- Top left
6. Provide context in the caption every time.
If followers are just scrolling down their feed, one little tile might seem really strange on its own, especially if there are words being cut off. That’s fine, as long as you use the caption to let everyone know it’s SUPPOSED to look like that. It’s important to provide that context with each photo you post because you can’t expect that all your Instagram followers have actually been following along the whole time and know what’s going on.
7. You might need to use two calls-to-action.
If someone is just scrolling through their feed, they’ll need to know that they can go to your profile to view the grid as it comes together. That’s request #1. Then if you’re trying to use each post as a way to drive some other action (pre-saves, pre-sales, ticket sales, video views, giveaways, etc.), you’ll need to work that second request into the caption as well — and consider using the link in your Instagram bio to accommodate the second call-to-action.
8. Don’t forget hashtags.
Ever. Hashtags give you a great way on Instagram to connect with communities beyond your existing audience.
9. Share the campaign updates — but probably not the photos — on other social platforms.
If you want, you can use each post as a prompt to go onto Facebook and Twitter to remind people that you’re slowly building the image over on Instagram, and ask them to follow you there.
10. Double-check the order of your tiles.
Whether the split tiles are stored on your phone’s camera roll or in a folder on your desktop, make sure they’re organized in such a way that it makes it easy for you to grab the correct pic and post them in the correct order, as outlined in step #5 above. If you can, compare the tiles to the original, and reconstruct them in your mind to be sure you get the sequence correct before you post ANY of them.
Well, that may be more information than you ever asked for about creating grids on Instagram, but there you go! If you have additional tips or questions, please comment below.
Also, follow me on Instagram to see the full cover artwork come together, and pre-save my upcoming single on Spotify if you want to be among the first to hear it (and be entered into a drawing to win a free t-shirt too). Thanks!
Chris Robley is an acclaimed singer-songwriter and award-winning poet from Maine.
His Beatlesque indie-pop and milltown Americana songs have been praised by The Associated Press, No Depression, KCRW, The LA Times, Boston Globe, NPR, American Songwriter, and others.
His poems have appeared in Poetry Magazine, Prairie Schooner, The Poetry Review, and more.
Robley has received a Maine Literary Award in Poetry, Boulevard’s Emerging Writers Prize for Poetry, and in 2016 was selected by former US-poet laureate Robert Pinsky as a finalist for the Dorset Prize.